Migrating to nanoCAD
Each section headline has a hyperlink to our Online Help page with thorough instructions. Click on the heading to know more about the topics. When migrating to nanoCAD, the first thing you notice is a familiar ribbon-type interface, similar to AutoCAD. Despite the visual layout, we will see some similarities in features in the first section:


COMMAND LINE
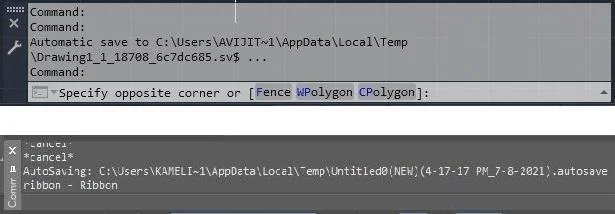
The command line is a panel designed to input commands using the keyboard. It also displays nanoCAD tips, system messages and options available for the running commands.
The command lines in nanoCAD and AutoCAD look identical. For a more convenient view of the command protocol (or so-called command history) you can open a text box (a copy of the command line) by pressing the F2 key.
You can see the list of all nanoCAD commands with their aliases by typing " ‘ " in the command line.
STATUS BAR
The status bar shows the cursor position in the coordinates and drawing tools. With the right click on the status bar you can open the contextual menu – Status Bar Configuration (Figure. 3), with a list of possible Status Bar elements. It allows you to fully customize the status bar by excluding/adding items through the context menu.

DRAWING LAYOUTS’ TABS
When a new drawing is opened, nanoCAD creates four sheets with the most popular document sizes: A4, A3, A2 and A1. You can adjust the number and location of the sheets when you start using the templates (see “DWT and DWS Standard Files”).
To switch between the model space and the sheet, use the button located at the bottom left of the drawing layout tabs

TOOLBARS
Toolbars can be added to both the ribbon and the classic interfaces. You can call the window with a list of available toolbars (Fig.5) by entering the command "Toolbars" in the command line:

In the window, you can choose the toolbars you want to add to the interface, as well as the look of the toolbars and the size of the buttons. Any custom toolbars you create are also added to this list (see “Interface Settings”).
You will find a number of buttons on the toolbars to run specific commands. When you place the mouse over a button icon, a hint pops up with the command name

INTERFACE SETTINGS
You can always customize the interface. Go to the settings and adjust the interface layout (ribbon/classic), visibility, order and location of the toolbars, as well as the look of the command line and the status line, which is everything around the interface.
nanoCAD interface settings files are located at the directory : %AppData%\Nanosoft\nanoCAD XX\Config
Unlike in AutoCAD where the settings files have an *.cuix extension, nanoCAD custom interface settings files have various extensions.
*. cfg - classic interface: menus, panels, hot keys, state line, contextual menu
*. xml - ribbon interface
*. pgp - team aliases
*. cuix - additional app interface
Almost all the information about the interface is stored in the configuration files *.cfg.
To open the Customize user interface window run the INTERFACE command

In the window, you will see the File tab that contains a list of operations with configuration files.
CUSTOMIZE WINDOW OPTIONS
| File | Configuration file management commands:
|
File name |
The field shows the path and name of the edited .cfg file. The current configuration file opens by default. |
The window contains 9 tabs arranged in accordance with the command layout on the interface. The full list of the selected tab’s elements is displayed in the upper left window of the Customize user window as a tree. In the upper right section of the window, you will see all nanoCAD tools, commands and controls to create and edit interface objects, such as menus, toolbars, and status bar.
What's Your Reaction?


